Electric Drink Cooler - Part 4
The cooler was working, but only slightly. The bottom of my cup/can/bottle was cold, but the sides and top were warm. I decided that I should channel the cold up the sides with more aluminum flashing.
I made a ring of aluminum. Two-sided tape wouldn't hold it together, so I but two bolts through it instead. I cut tabs and bent them out to make contact with the aluminum base plate. Finally, I put a piece of foam board by the tabs so I can mount it to the frame. The foam board also helps to hold the tabs in contact with the base plate.
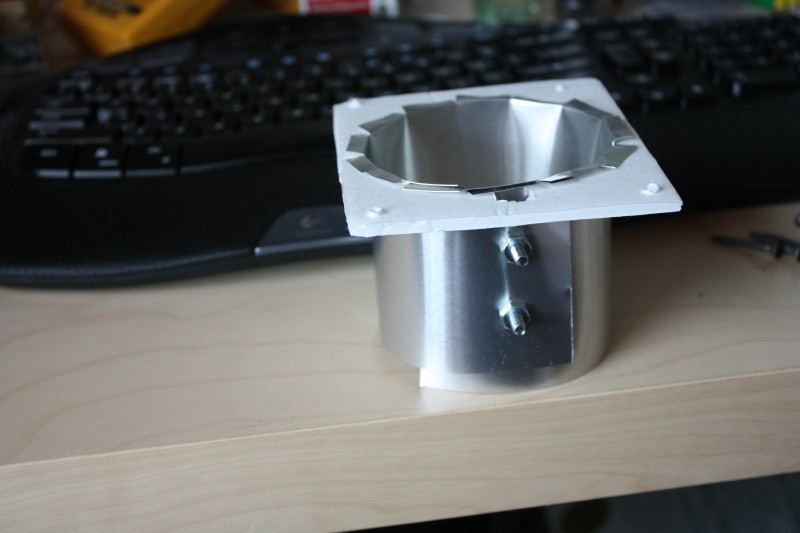
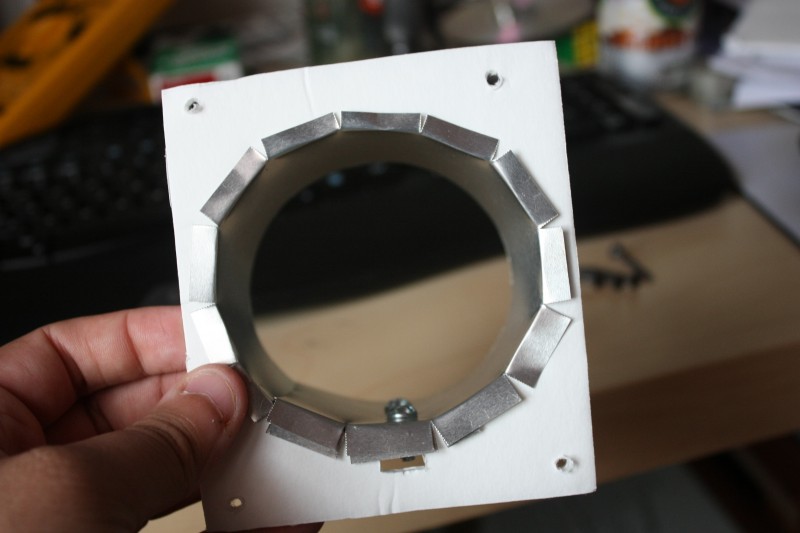
I secured the ring to the frame with some thermal paste and wood screws.
I also put a piece of foam board on the bottom on the frame. This was to make the bottom solid, prevent anything from going into the heat sink or fan if I put it down on top of something, and helped prevent the cooler from scratching every surface I put it on.
After I mounted the ring, I added stiff green foam to help add insulation and cover the sharp edges of the aluminum.
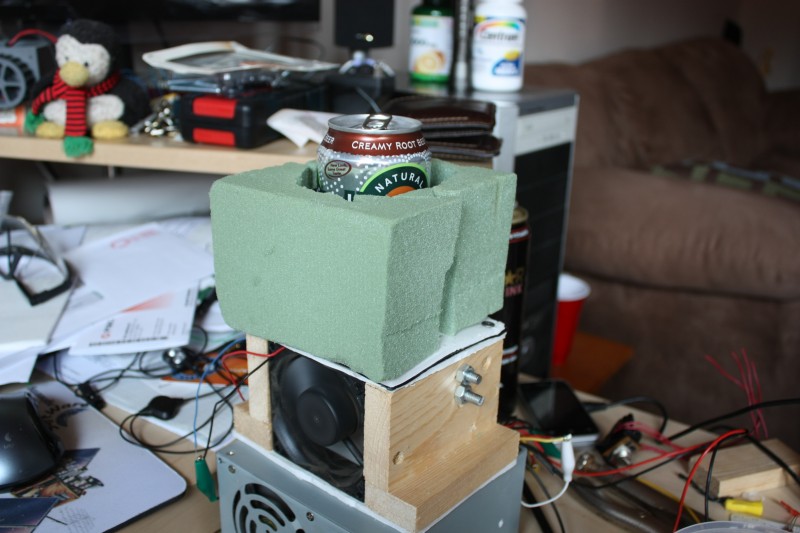
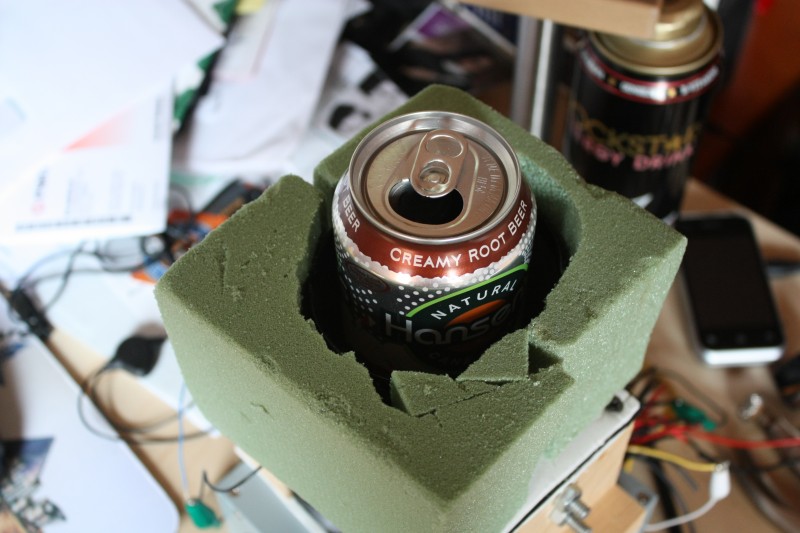
Ultimately, this didn't help at all. I removed the green foam and used a different approach. I bent a piece of foam board around the ring. It is held in place by the bolts that hold the ring together. I also put electrical tape around the sharp top edge of the aluminum since it was still exposed.
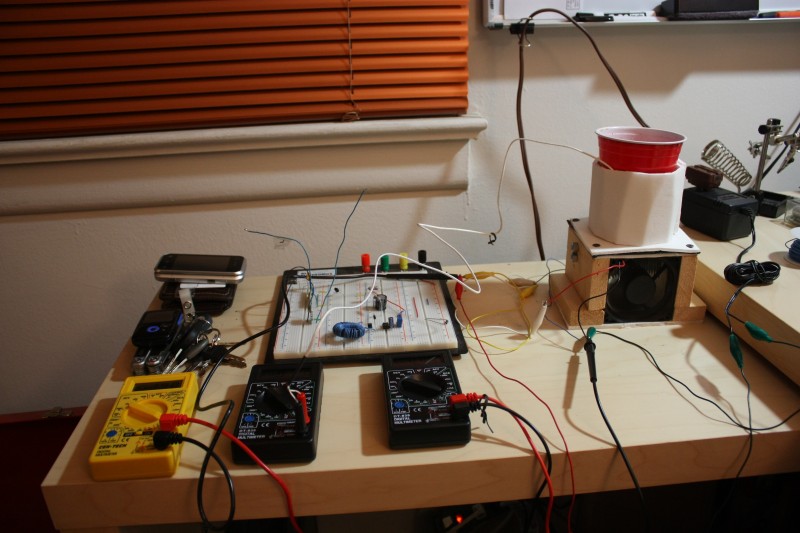
I added a 9V unregulated power supply, reclaiming my lab/old-ATX supply for future projects. An unregulated supply works because this project is completely analog. As more amperage is pulled from the supply, the supplied voltage becomes lower. As long as I pulled about 1 A at 5 V, the temperature would be all right. 8 A at 12 V would be better, but I don't have a supply that powerful, and I don't know if my heat sink would work well enough. Note: all TECs are different. I arrived at these numbers experimentally.
The breadboard circuit was an attempt at building a boost converter. I wanted to run the fan at regulated 12 V at 100 mA. Since I didn't want two power supplies, I tried to boost the current one. I used discrete components. All I managed to do was blow up a multimeter.
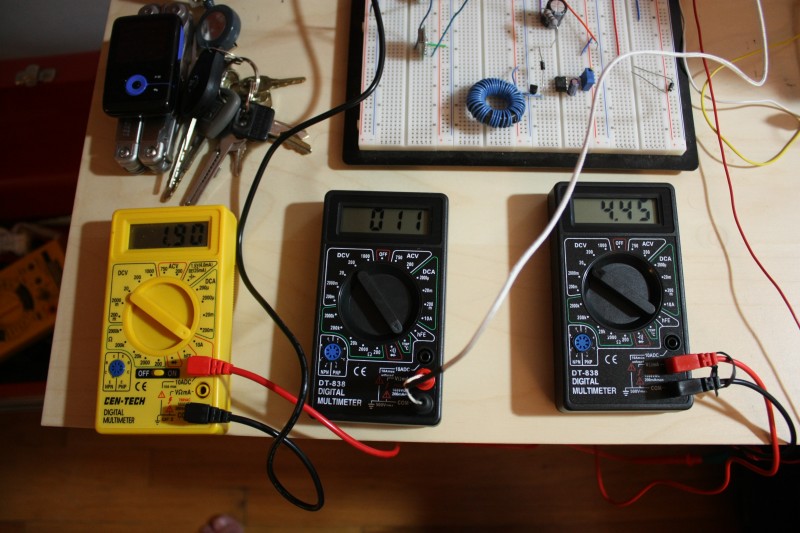
The drink cooler is running at 4.45 V @ 1.90 A. This cooled the air between can and aluminum ring to 11°C by the base plate. I let this run for a few hours, checking periodically. Nothing exploded, and the power supply didn't not become very warm. I then soldered everything together
Conclusion
The electrical tape on the rim of the aluminum ring started falling off when the ring became cold. I replaced it with duct tape.
I will buy a boost converter chip. They're cheap and simple to use. The only reason I didn't use one was that I didn't have one, and shipping takes time. I wanted to finish this the same weekend that I started it, although the blown multimeter crushed that hope anyway.
Adding a boost converter will let the fan run faster and with more force. This will cool the heat sink more and let the TEC cool the drink more without needing more power.
Installing a power switch would make using this a bit easier. Right now, I have to crawl under my desk to plug and unplug the cooler.
A power connector would also be an improvement. It would let me run the power line behind my desk. I would also be able to move the cooler between places, such as my desk at home and my desk at work, easier.
If I can get a more powerful power supply, I would add a microcontroller to monitor and regulate the drink temperature. 5 V cools the drink; 12 V can actually freeze it.
